Replacing the SSD in my laptop
2024-02-29A few months ago, when using my Thinkpad X220 laptop, I noticed that it hangs up for a moment when accessing a certain directory. Since the laptop is quite old (I bought it pre-owned in 2015) and I use it rather sparingly (I have a beefy tower PC that serves as my main machine), I wasn't very much bothered by it. Eventually, I decided to take a look into the issue.
As my knowledge of computer hardware is very limited, I turned to the internet in search of help. After reading through some forum posts, I decided to start out by asking the disk to perform a SMART self-test. The initial "short" test did not find any issues; while this was comforting, I'd rather err on the side of caution, so I went ahead and ran the "long" test. After some 40 minutes of waiting, the results were available.
SMART Self-test log structure revision number 1
Num     Test_Description       Status                  Remaining       LifeTime(hours)
# 1     Extended offline       Completed: read failure 90%             15553
Oh. Well, shit.
Preparing to clone the disk
So obviously, I needed a new disk. I went on the interwebz and ordered a Samsung 870 Evo series SSD; I use an 860 in my tower PC, so I knew it should be a cost-effective and pretty reliable choice. I also took the opportunity to get a larger disk (500GB vs. 250GB on the original one). After waiting a few days for my order to arrive, I retrieved it from the parcel locker... and then put it on a shelf, as it was Christmas time and I had other stuff on my head.
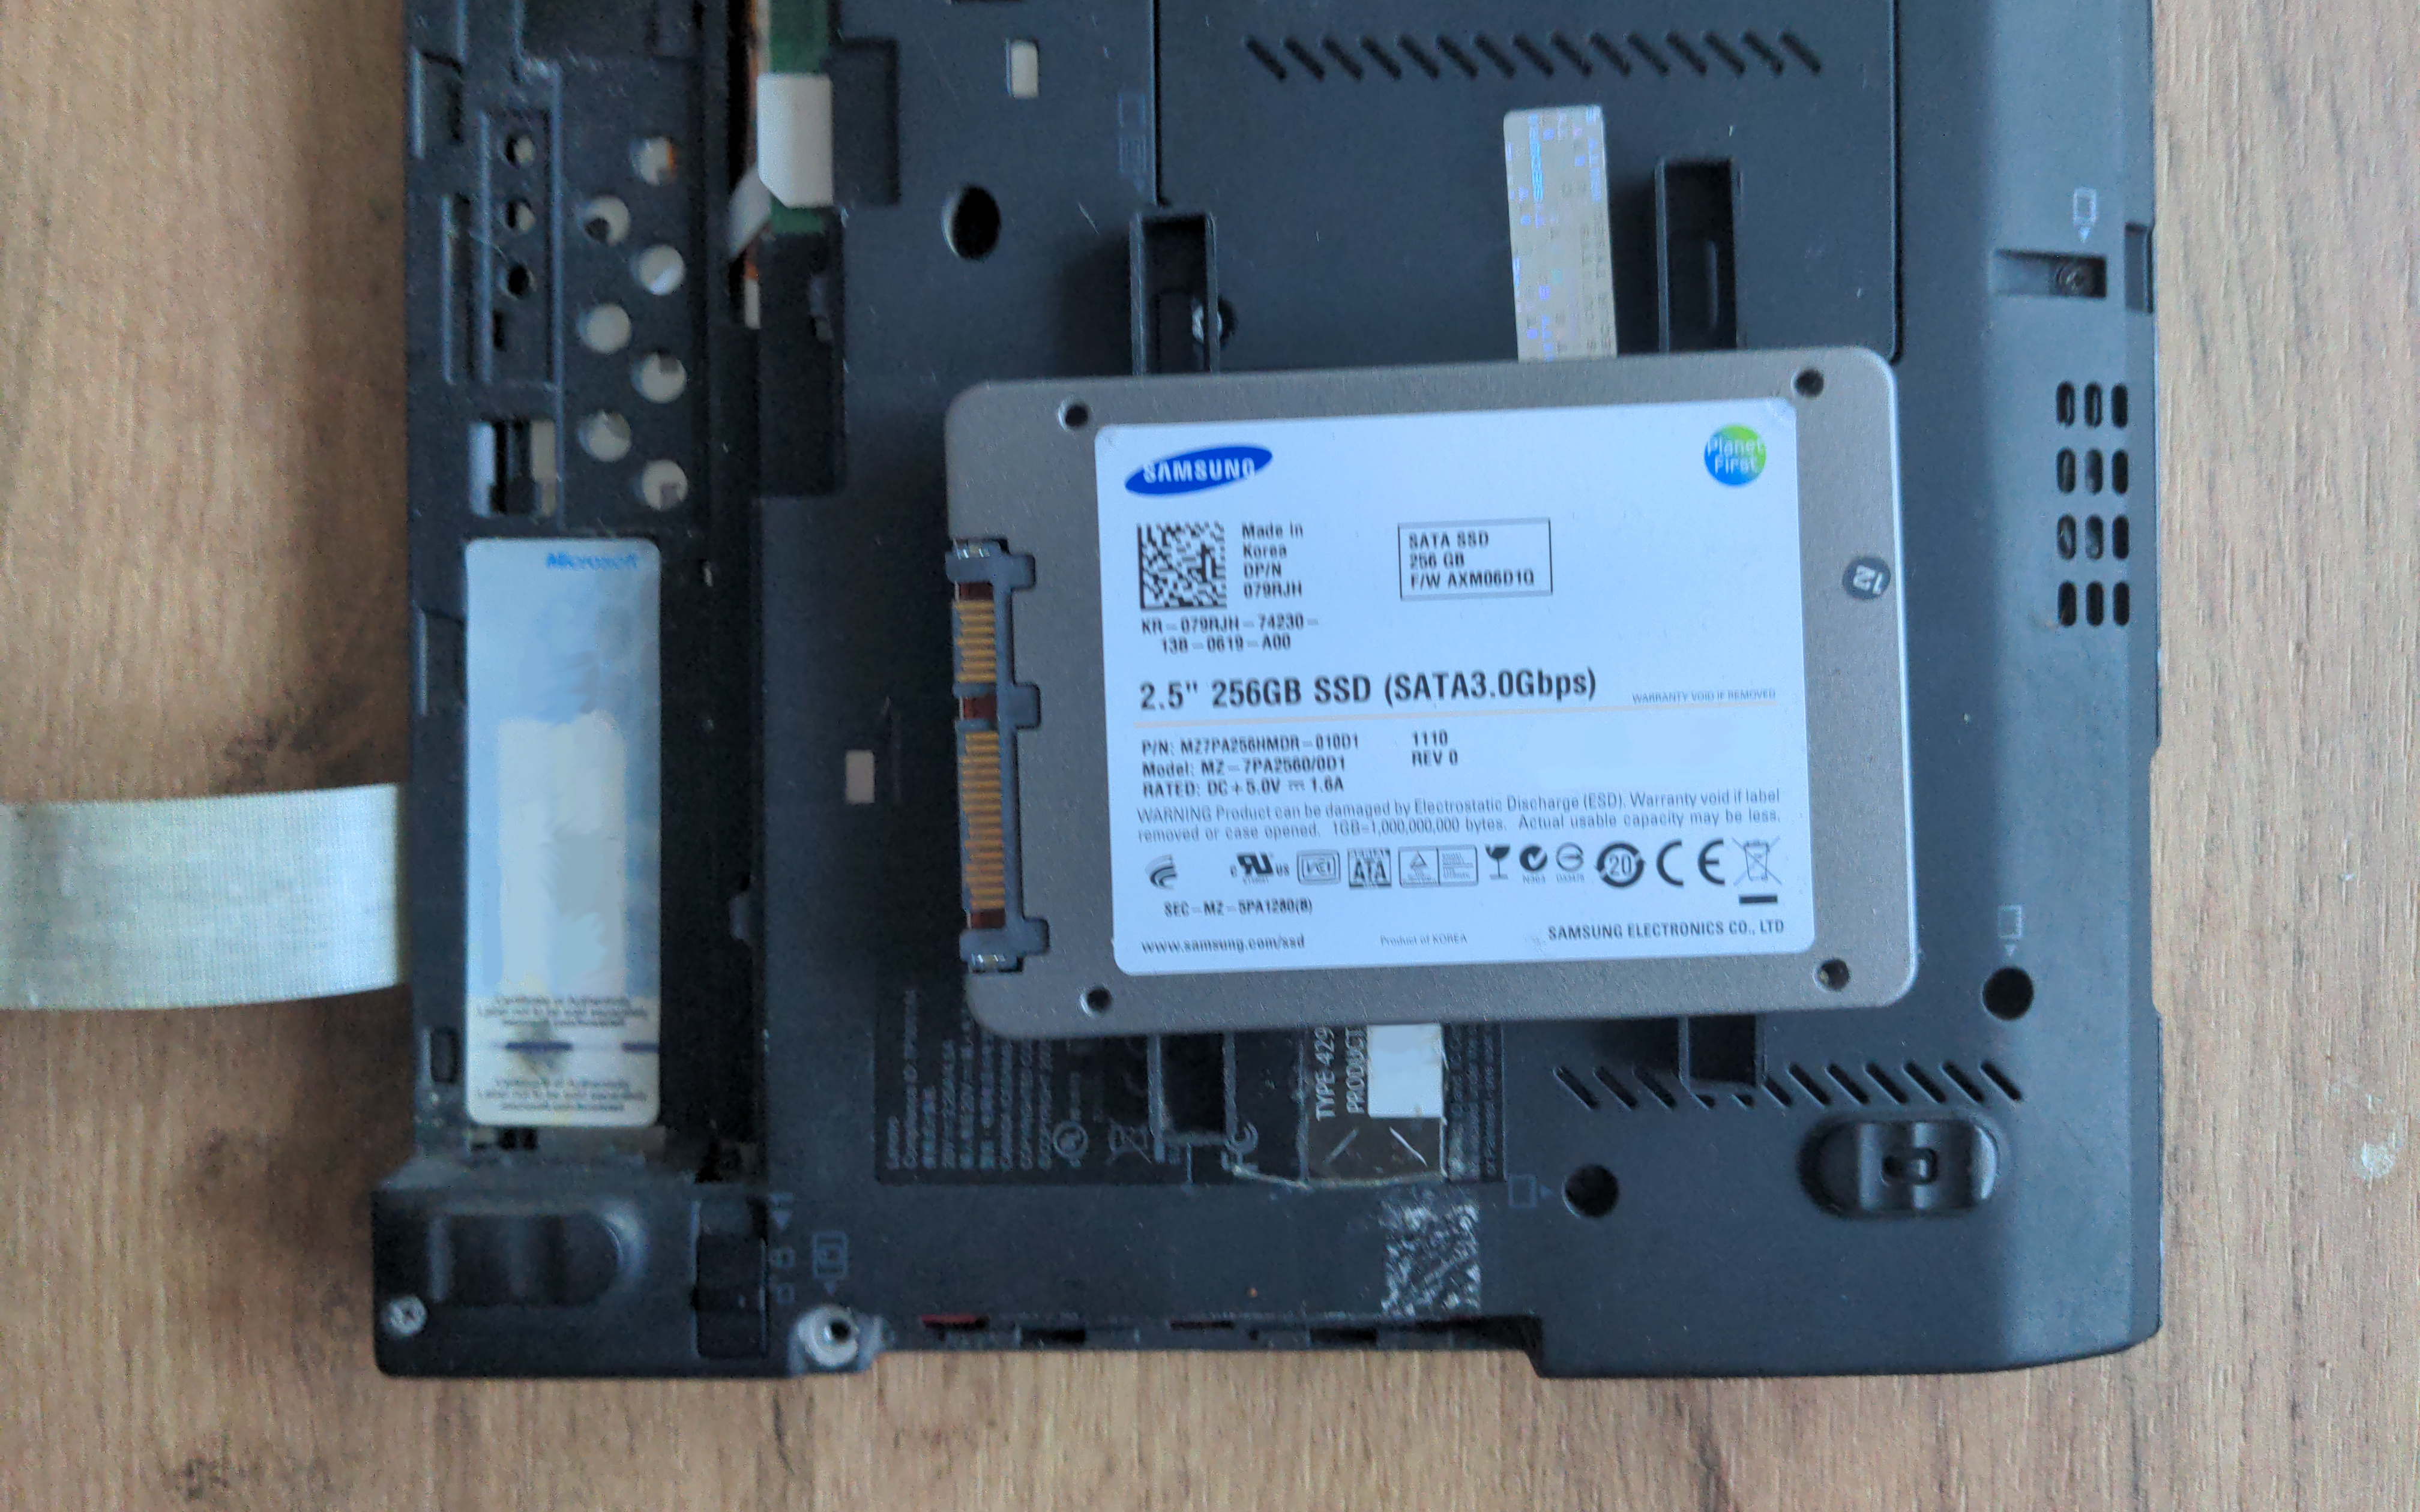
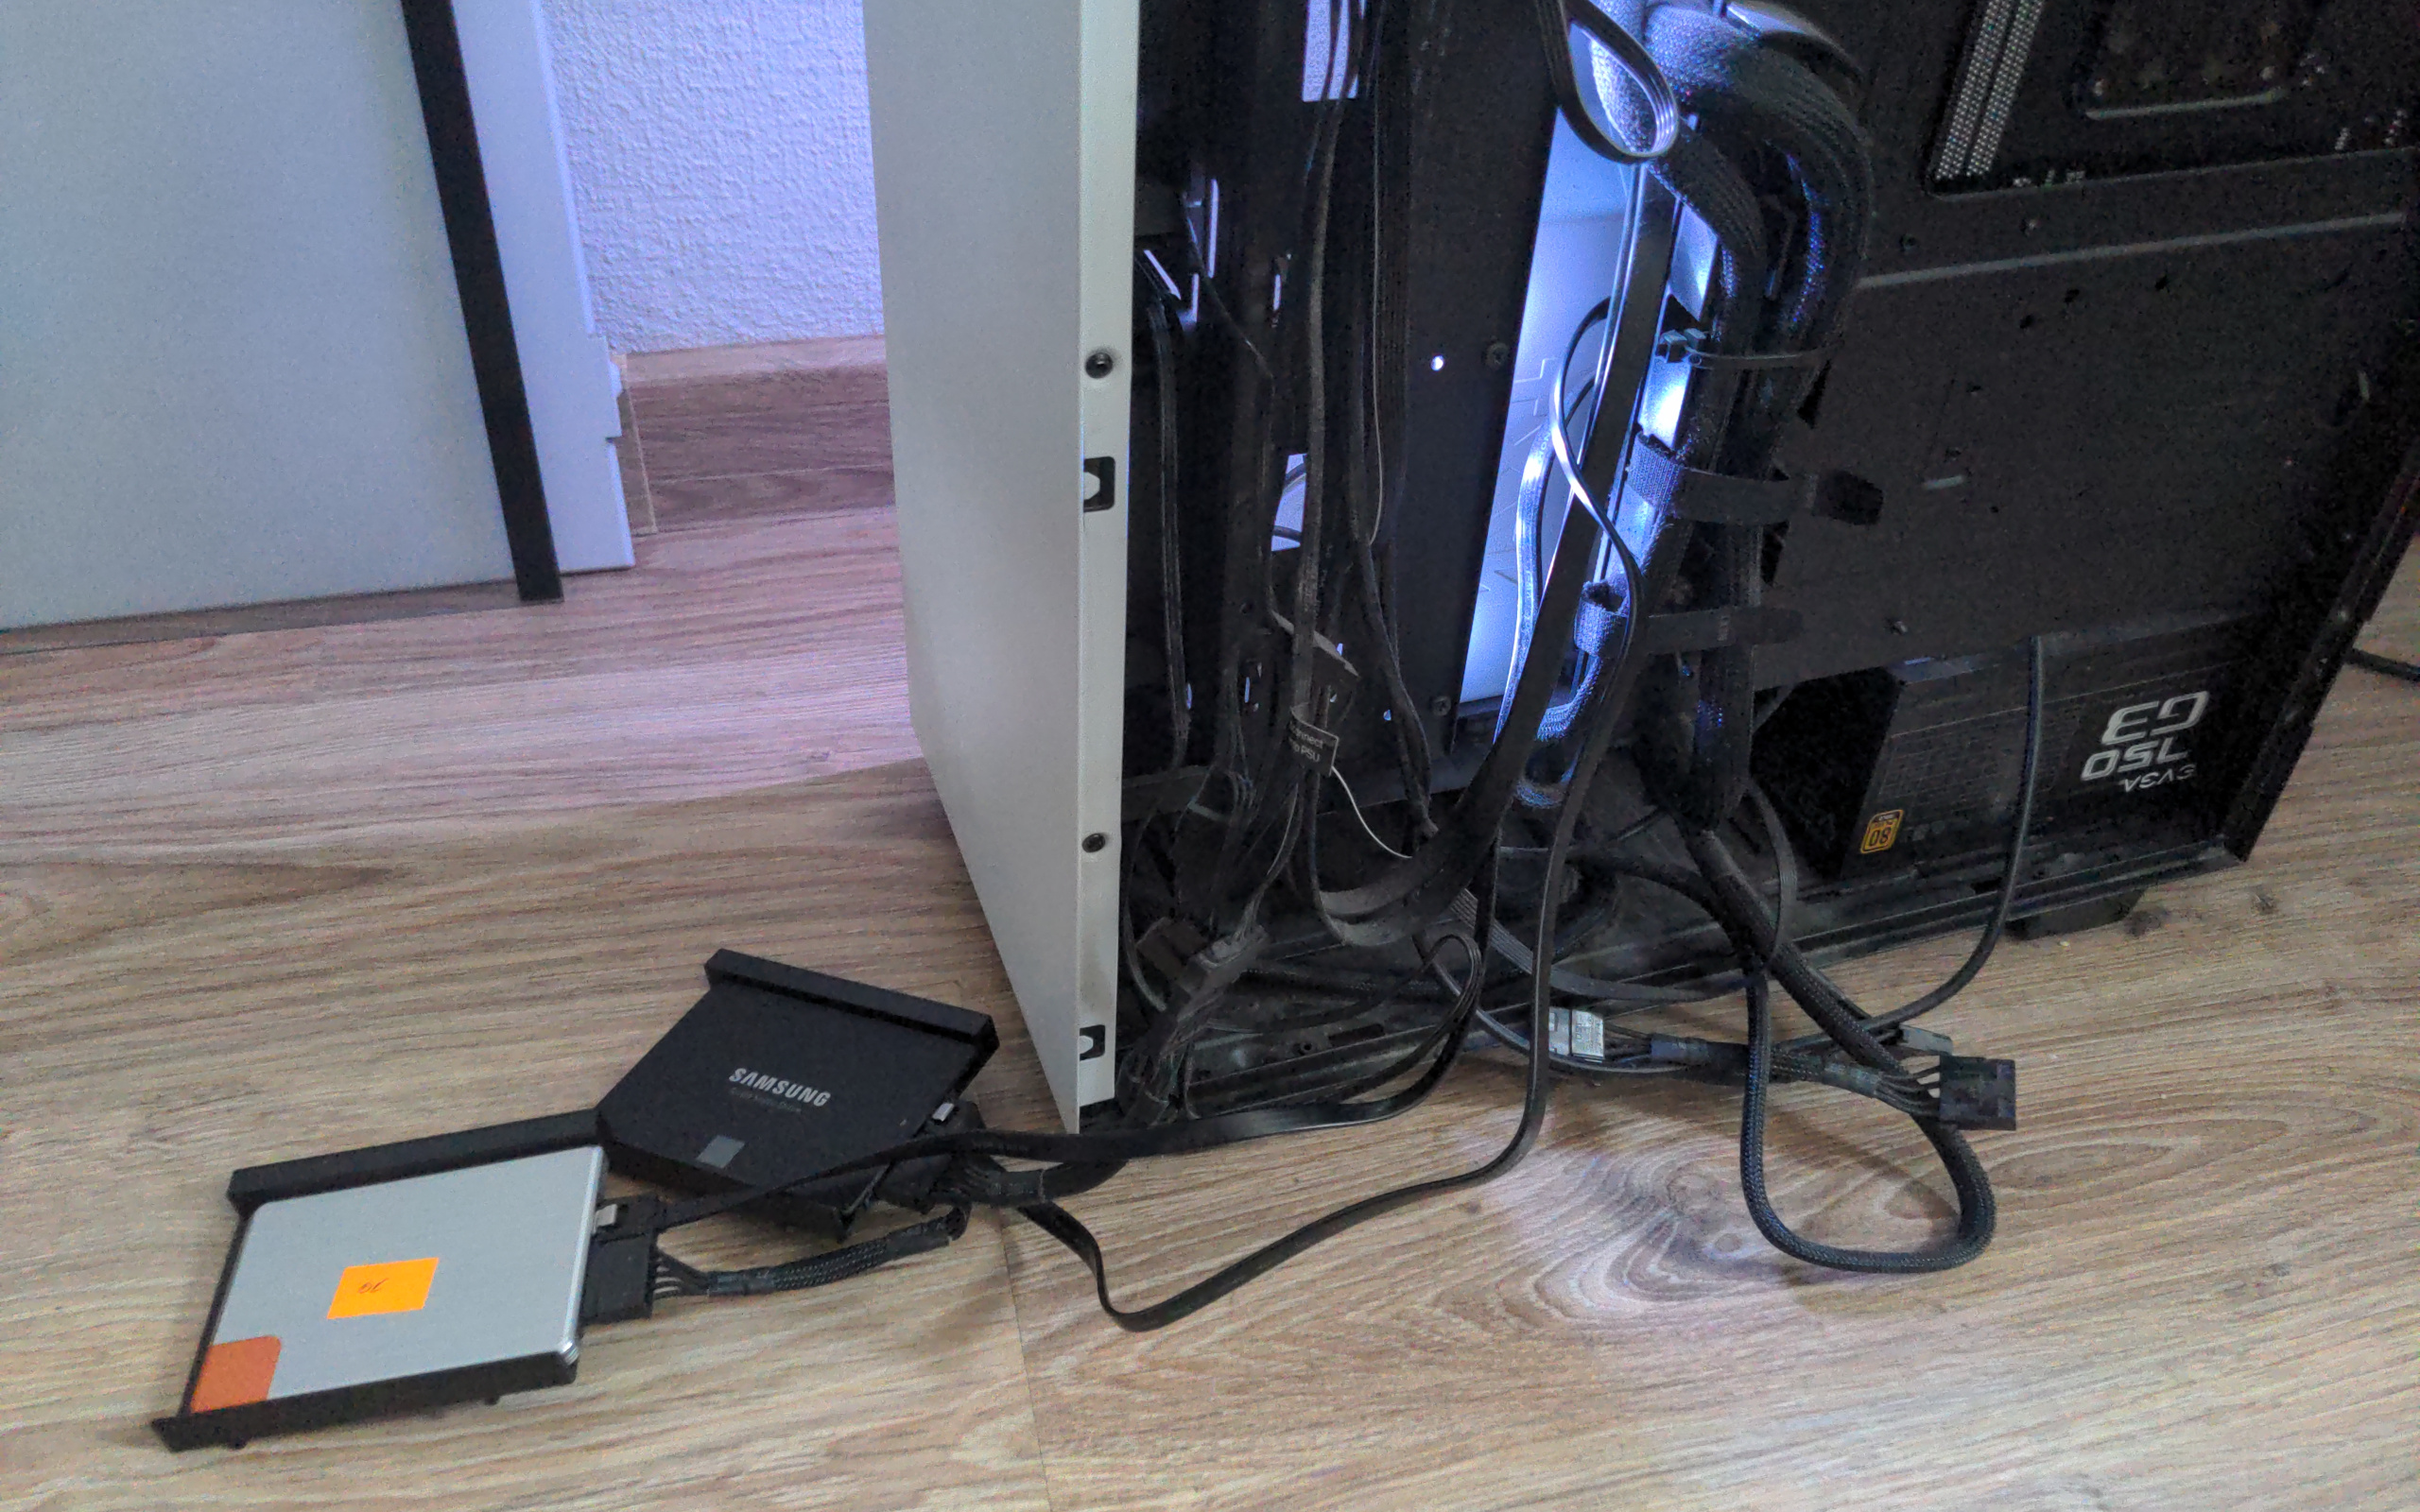
Fast forward a week or two and I finally had a free weekend. I consulted the internet for an explanation on how to remove the SSD from my ThinkPad, which turned out to be a matter of removing only a single screw (yay for repairability). After taking the disk out of the laptop, I went to my tower PC and removed the side cover to gain access to the SATA connectors.
This is where I ran into a small hiccup, as it turned out I did not have any spare
SATA data cables. Well, almost. After rummaging through every box-o'-cables I had at home,
I found a single spare data cable. Still, the power supply in my PC had only two SATA power plugs,
which meant that I had to remove the /home disk from the PC.
After connecting everything, I booted the PC and logged in as root. I then used blivet-gui
to partition and format the new disk. Once that was done, it was time to clone the disk.
I opened the terminal and started typing in the dd invocation.
I decided to start by cloning the root partition, as - worst case scenario - I could
always just perform a fresh install of the OS.
$ dd if=/dev/disk/by-id/… bs=1M status=progress of=/dev/disk/by-id/…Remembering the old joke about how dd stands for "Disk Destroyer",
I triple checked that I got the arguments right.
(This was made a bit easier by the fact that the old disk still used LUKSv1 encryption.)
Finally, I pressed Enter and anxiously watched the progress bar.
After a couple of minutes, dd finished. I tried mounting the copied partition
and it worked perfectly. Since the new partition was a bit larger than the original,
I also needed to resize the filesystem.
$ e2fsck -f /dev/disk/by-id/…
e2fsck 1.47.0 (5-Feb-2023)
Pass 1: Checking inodes, blocks, and sizes
Inode 1182596 extent tree (at level 1) could be narrower.  Optimize? yes
Inode 1182663 extent tree (at level 1) could be narrower.  Optimize? yes
Inode 1182705 extent tree (at level 1) could be narrower.  Optimize? yes
Inode 1182712 extent tree (at level 1) could be narrower.  Optimize? yes
Inode 1183059 extent tree (at level 1) could be narrower.  Optimize? yes
Pass 1E: Optimizing extent trees
Pass 2: Checking directory structure
Pass 3: Checking directory connectivity
Pass 4: Checking reference counts
Pass 5: Checking group summary information

/dev/disk/by-id/…: ***** FILE SYSTEM WAS MODIFIED *****
/dev/disk/by-id/…: 559057/2621440 files (1.3% non-contiguous), 7838169/10485760 blocks

$ resize2fs -p /dev/disk/by-id/…
resize2fs 1.47.0 (5-Feb-2023)
Resizing the filesystem on /dev/disk/by-id/… to 20967424 (4k) blocks.
The filesystem on /dev/disk/by-id/… is now 20967424 (4k) blocks long.
This worked like a charm. Feeling confident, I moved on to cloning the /home partition.
$ dd if=/dev/disk/by-id/… bs=1M status=progress of=/dev/disk/by-id/…
530939904 bytes (531 MB, 506 MiB) copied, 22 s, 24.4 MB/s
dd: error reading '/dev/disk/by-id/…': Input/output error
506+1 records in
506+1 records out
530939904 bytes (531 MB, 506 MiB) copied, 22.4828 s, 23.6 MB/s
Oh. Well, shit.
ddrescue to the rescue
So obviously, the disk was borked (big surprise). Not knowing how to proceed, I once again
turned to the internet for help. Reading through a couple of forum posts and Stack Overflow
questions, it seemed that my best choice was to use the aptly named ddrescue to try
and rescue the data on the disk.
After skimming briefly through the man page, I typed the command in the terminal and launched it. The whole process took a couple of hours, but then, once it was done...
     ipos:  199143 MB, non-trimmed:        0 B,  current rate:       0 B/s
     opos:  199143 MB, non-scraped:        0 B,  average rate:   5489 kB/s
non-tried:        0 B,  bad-sector:  133603 MB,    error rate:  11689 kB/s
  rescued:   65539 MB,   bad areas:      654,        run time:  3h 18m 58s
pct rescued:   32.91%, read errors:262983414,  remaining time:         n/a
                              time since last successful read:  2h 38m 34s
Huh. So obviously, things were not good. I spent some more time rummaging through forums
and Stack Overflow; fortunately, the consensus was that ddrescue can take a couple
of tries to clone the disk fully and I should just try again. People also suggested
making use of the --reverse option, which makes the program copy the disk starting
from the end towards the beginning, and alternating between normal and reverse runs.
To get a better understanding of how the tool works, I consulted the manual.
The whole process is split into a couple of phases, with the final phase
(called "scraping") going over every sector individually and trying to copy it.
This makes it the longest phase - it was responsible for 2½ hours of the 3⅓ hours total running time.
As such, I decided to forego trimming on my next attempts. This proved to be a good decision,
as watching kernel logs through dmesg later revealed that, after some time,
the old disk would just "give up" - it'd stop responding for a minute, and then
produce a 100% error rate until it was power-cycled.
After running ddrescue for a second time, the copy was still far from done,
but the percentage of data recovered went up, so it seemed that not all hope
was lost. Over the next few days, I spent some time restarting the rescue
process again and again.
Run no | Direction | Data rescued | Percentage
------ | --------- | ------------ | ----------
     1 | Normal    |   65 539 MiB | 32.91%
     2 | Normal    |   67 653 MiB | 33.97%
     3 | Normal    |   68 049 MiB | 34.17%
     4 | Reverse   |   79 674 MiB | 40.00%
     5 | Reverse   |   98 003 MiB | 49.21%
     6 | Reverse   |  143 390 MiB | 72.00%
     7 | Reverse   |  147 711 MiB | 74.17%
     8 | Normal    |  154 532 MiB | 77.59%
     9 | Reverse   |  156 994 MiB | 78.83%
    10 | Normal    |  168 291 MiB | 84.50%
    11 | Normal    |  170 299 MiB | 85.51%
    12 | Reverse   |  199 113 MiB | 99.98%
    13 | Normal    |  199 113 MiB | 99.98%
    14 | Reverse   |  199 113 MiB | 99.98%
    15 | Normal    |  199 113 MiB | 99.98%
Finally, I got to a point where there was no more progress. While 99.98% is not 100%, it was still a lot better than I had expected just a few days ago, so I was very happy with the result. Of course, missing 0.02% of filesystem blocks can mean anything - from having no effect at all (say, all those blocks were unused) to making the FS unusable (say, all those blocks were in the superblock area). There was only one way to find out - try and mount the filesystem.
$ mount --read-only /dev/disk/by-id/… /mntTo my great relief, the filesystem mounted fine, and after spending a couple of minutes
rummaging through the directories with cd and ls, I couldn't find any files
that were obviously broken. All that was left to do now was to install the disk
in the laptop and hope for the best.
Getting the thing to boot
Installing the disk back in the laptop was trivial. After performing all the necessary steps,
I plugged the power connector, pressed the power button and anxiously waited for what
comes next. After a couple of seconds, the screen told me: No boot device found. Sigh.
I took a Live USB I had laying around and used that to boot into a working system.
A short look at the disk contents revealed the cause: as a result of all the shenanigans
involved in copying the /home partition, I completely forgot to copy the /boot partition.
Welp. Guess I have to remove the disk from the laptop and connect it to the PC again.
After copying the contents of the /boot partition, I dismantled the disk-cloning monstrosity
for the last time and put the new disk back in the laptop. Once again, I plugged in the power
connector, pressed the power button... And once again, the screen told me: No boot device found.
Feeling a little grubby
Confusion quickly gave way to embarassment, as I recalled the existence of this nifty little thing
called the Master Boot Record. My X220 was configured to use the legacy BIOS boot method
instead of UEFI; and while cloning the /boot partition transferred the GRUB config, kernel images
and other important files, it didn't do anything to the MBR. Having taken a deep sigh
of self-disappointment, I plugged the Live USB into the laptop once again.
$ grub2-install --target=i386-pc --boot-directory=/mnt /dev/sda
Installing for i386-pc platform.
Installation finished. No error reported.
Okay. With that out of the way, I should finally be able to boot, right?
Nope! This time, GRUB told me that it cannot find the root partition. Well, yeah. I forgot to update the disk UUIDs inside the configuration file. A quick trip into the Live USB and a little bit of vim trickery later, things were finally ready. After rebooting, I was greeted by the GRUB menu - never thought I'd be so happy to see it! I selected the kernel to boot and watched the messages fly on the screen. All that was left to do now was to enter the LUKS encryption password... and the kernel didn't ask for it. It just... sat there, doing nothing.
That's a bit of a pickle, in(n)it?
I was getting quite frustrated at this point, as I really had hoped to be long done by this point. After scratching my head for a bit, I tried taking a closer look at the kernel parameters.
root=UUID=… ro resume=/dev/mapper/luks-… rd.luks.uuid=luks-… rd.luks.uuid=luks-…Clearly, these referenced disks by UUIDs, and yet the kernel didn't want to use them.
Consulting an article listing the meaning of the rd. options revealed that, instead of listing
every disk using rd.luks.uuid=…, one can also just use rd.auto=1 and let the kernel
figure it out on its own. Tired and resigned, I rebooted the laptop to GRUB,
pressed e to edit the commands before booting, made my changes, and hoped for the best.
Great success! The kernel's autoassembly of special devices like cryptoLUKS feature worked perfectly and I was greeted with a prompt for the decryption password. I input the passphrase and anxiously awaited as the system... did nothing. After a bit over a minute, I saw an error message informing that it could not complete the cryptography setup. I stared at the screen for a few seconds, until I noticed - those UUIDs seem wrong. Aren't they the old ones?
Ah, right. Of course. I forgot to edit /etc/fstab and /etc/crypttab.
Time for another trip into the Live USB. Now everything should work!
Except it didn't - I got the exact same error as before. Nothing changed.
Couple more angry sighs of dissappointment later, I realised - but of course! Editing those files could not change anything, as they lived on the encrypted partition. That's a bit like sticking the code for a safe inside the safe. But then, where does the kernel take the fstab and crypttab from? I had a very vague recollection of the idea that an initramfs is involved in the boot process. Could this be it?
After skimming through a few articles, my suspicions were confirmed. During the early boot phase, the kernel uses an initial file system taken from the initramfs. Among the contents of the initramfs are the fstab and crypttab files. Which meant that, while updating them definitely was a good idea, I also needed to edit the copies sitting inside the initramfs I was using. Or, alternatively, generate a new one with updated contents.
It was time for one final trip to the Live USB. No promises on the "final" part, though.
$ mount /dev/mapper/luks-… /mnt
$ mount /dev/sda1 /mnt/boot
$ mount -t devtmpfs devtmpfs /mnt/dev
$ mount -t proc proc /mnt/proc
$ mount -t sysfs sysfs /mnt/sys
$ chroot /mnt
$ cd /boot
$ dracut --fstab . 6.5.10-100.fc37.x86_64
This generated a new initramfs at /boot/initramfs.img. Now all that was left to do
was to reboot the machine, and, before booting, edit the commands in GRUB.
Okay, let's go. I pointed the kernel at the new initramfs and used rd.auto for good measure.
The decryption prompt came up and I entered the password. Nothing happened. I felt my heart
go up to my throat... and then the system displayed a message informing that LUKS setup was complete.
Huh. Guess I might have cranked the crypto settings a bit too high.
After a few more seconds, I was greeted by the graphical login screen. I entered my username and password and finally, finally arrived at my desktop. Just as I last saw it over a week ago. ...wait, this took a whole week?
The aftermath
Once inside the system, I took a while to test things out and ensure everything works correctly.
After that, I regenerated the initramfs one more time (just for good measure) and regenerated
the GRUB configuration - which led me to discover that I overlooked editing /etc/default/grub,
as the disk UUIDs passed to the kernel are not auto-detected, but rather taken from said file.
With these two changes, I was now able to boot the system without having to manually edit
the GRUB commands each time.
I then proceeded to upgrade the OS from Fedora 37 (which was EOL for almost two months at this point)
to the latest release of Fedora 39. Once that was done, all that was left to do was to resize the /home
filesystem. As expected, e2fsck complained a lot, but it was able to fix up the missing bits.
And with that, my (mis)adventure was finally over.
tl;dr, or retracing my steps for future reference
I like to joke that half of my blog's audience is just me, re-reading my own articles to refresh my memory - so here's a quick to-do list, in case I ever need to repeat this.
-
Hook up the old disk and the new disk to a single machine.
-
If the disks are of the same capacity, you can use
ddto clone the entire disk. Otherwise, you'll have to partition the new disk and copy each partition separately. -
If things go awry with
dd, pray to your favourite deity and try usingddrescue. -
ddrescuecan take a few attempts to rescue all the data. The--try-againand--retrimoptions are your friends. You should also try alternating between normal operation and using the--reverseoption. -
Remember to clone all the partitions. (duh)
-
If you're using legacy BIOS for booting, and you cloned individual partitions, you'll need to install the bootloader in the new disk's MBR.
-
Go through
/boot/grub2/grub.cfg,/etc/default/grub,/etc/fstaband/etc/crypttaband update the UUIDs of the disks. - Regenerate the initramfs.
There might be some extra steps involved when using UEFI for booting, or if you ditch GRUB for systemd-boot or some other bootloader. Should you know about those - feel free to contact me and I'll update the list above.
Comments
Do you have some interesting thoughts to share? You can comment by sending an e-mail to blog-comments@svgames.pl.